The floating shelf is a rather popular DIY home decor project these days, and it can easily become a permanent fixture of your home. However, floating shelves themselves are not difficult to make, but hanging them on the wall might be a bit harder. Thankfully, there are alternative methods you can do. You can cut the shelf to length, which is fairly easy to do, or you can drill a hole, thread the shelf through the hole, and screw the shelf into the wall, which does take some practice. Both methods require a tool that cuts metal, such as a table saw, a hacksaw, or a drill.
If you have ever looked longingly in a friend’s kitchen and thought, “I wish mine looked as pretty,” but never had the knowledge to do it yourself, then this post is for you. So if you’re thinking of starting your next big remodeling project, then get in touch with a professional similar to this general contractor in Englewood, TN, and you could show them this article. It could provide plenty of inspiration. After all, the shelves above your stove, refrigerator and sink are prime real estate, and they deserve to shine.
So, if you want to change the look of your kitchen, or indeed any other room in your house, without spending a fortune, consider creating a floating shelf to display some of your favorite accessories. Floating shelves are easy to install, and you will not even have to break the bank. But, as an add-on (and if you have the budget), you could also consider sprucing up the interior design a bit. If you have an older style kitchen, then consulting with professionals like Helen Coulston could be the way to go to modernize the space. This way, the floating shelves can make for a great complementary storage solution for your attractive kitchen. Here are the steps of how to create a floating shelf.
Locate the wall studs
A floating shelf is one of those DIY projects that you can easily master. All you need is a few materials, such as wood, nails, glue, brackets, and paint. Once completed, a floating shelf will not only make your home look more organized and clutter-free, but it is functional as well. To create floating shelves, you will first need to locate the wall studs.
Cut wood for the shelf cleat
The first step to creating floating shelves is to cut the wood for the cleat. There are two options for cutting the wood: using a jigsaw or a scroll saw. Use a jigsaw to cut the 2 pieces for the cleat, leaving both ends about 1/4 inch longer than the width of the shelf. Use a scroll saw to cut the pieces of wood for the cleat into 2.5-inch-wide strips. Cut the strips into 3-inch pieces. Use a drill, hammer, and nail to attach the cleat to the wall. Lastly, slide the shelf pieces into the cleat.
While cutting the wood for the shelf cleat, ensure that you have the necessary protective gear on, such as gloves (they got cool stuff Unigloves, should you need to pick some up ahead of your project), eye safety goggles or full face shield, and ear muffs. You can get these items online from companies that manufacture and sells industrial-level safety products. Protecting yourself is essential to avoid physical injuries and accidents when using tools like a jigsaw, drill, and hammer for DIY projects.
Nail the shelf box together
Nailing the box together is one of the steps to creating floating shelves in your home. Before you start building your floating shelves, you will need to nail your box together using the #14 Silicon Bronze Wood Screws or any other type of wood screws.
Assemble the shelf cleat
The assembly of shelf cleats is an important step in creating floating shelves. A cleat is a wooden board with holes cut to fasten the shelf brackets.
Attach the cleat to the wall
One of the most common mistakes is attaching the shelves to the studs in the wall. Doing so will prevent the shelves from being able to move freely. Instead, attach cleats to the wall. These can be purchased from the hardware store or made at home from wood or PVC pipe. Attaching the cleat to the wall is one of the key steps to creating floating shelves.
Sand the shelf
Sanding the shelf is one of the steps to crafting floating shelves, as it helps hold the shelf in place and smooths any rough edges. Sanding the shelf is done with wood, plywood, particleboard, MDF, and composite board. Sanding of the shelf is done to perfectly smooth the wood and remove any minor flaws.
You can use tools such as an electric sander, sanding plate, sanding sheet, etc., to give a smooth finish to your shelves. Remember to wear safety gloves to keep your hands protected from cuts and scratches while using a sanding device.
Attach the shelf
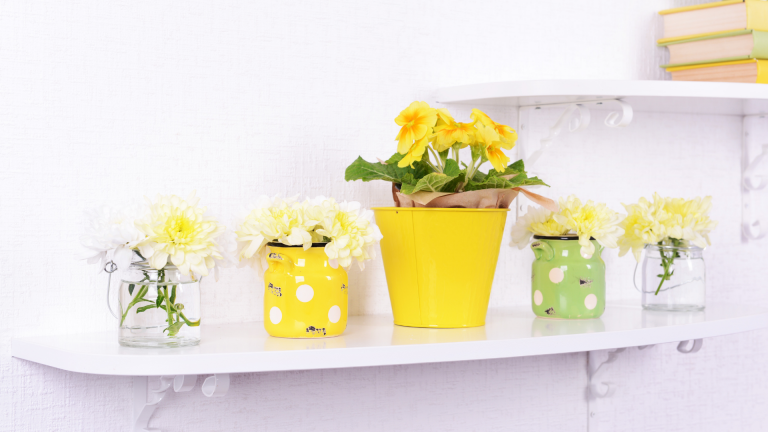
Attaching the shelf is the final step to completing your new floating shelves. These are like brackets that are used to mount the wall and are attached to the wall for holding shelves. These shelves can now be used to hold picture frames, jewelry, books, kitchenware, and more.
There are many ways to organize your home, and one of the quickest and easiest ways is to use floating shelves. Floating shelves have a reputation for being difficult to install, but with a little practice and patience, you can learn how to create your own floating shelves and set them up in your home.